Install and learn about Visual Studio
Visual Studio is an Integrated Development Environment (IDE) used to develop apps for Windows, the web, and other platforms. It consists of a source code editor, designer, compiler, and debugger.
There are three editions of Visual Studio 2022: the Community, Professional, and Enterprise editions. Visual Studio Community is free and it's the edition used throughout this module.
NOTE
The images used in this module might look different if you're using the Professional or Enterprise editions.
Download and install Visual Studio. Check out the Introduction to Windows 10 module for more detailed instructions and some automated scripts.
NOTE
Don't confuse Visual Studio — a comprehensive IDE for .NET and C# development — with Visual Studio Code.
Visual Studio Code is a standalone lightweight code editor with a plug-in ecosystem that's ideal for web development.
NOTE
Visual Studio is also available for Mac. This module doesn't cover development with Mac. You might want to visit Visual Studio for Mac.
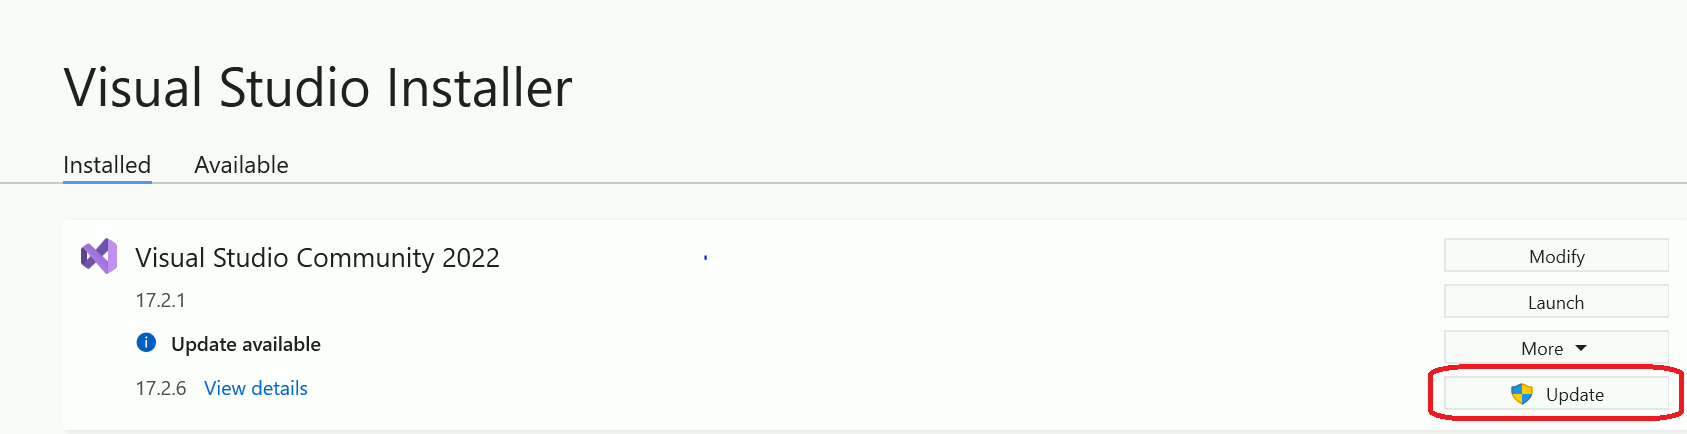
Install or update Visual Studio
Before starting, you need to install Visual Studio. Check that you're using the latest version by running the Visual Studio Installer:
- Open the Start menu and select Visual Studio Installer.
- Select the Update button if it appears. Visual Studio downloads and installs the most recent version.
Some definitions
Project
Projects include source code, like C# and XAML files. Projects also include resources, such as images, sounds, and other Visual Studio information.
Solution
A Solution can encompass more than one project. Your app might use another project for some key functionality or might run on different types of devices and need to be built in different ways. Solutions bring all of your projects together in one place.
IntelliSense
IntelliSense displays information about your code directly within the editor. It essentially provides inline documentation, which removes the need to look up reference information elsewhere. In some cases, it might even write small bits of code for you.
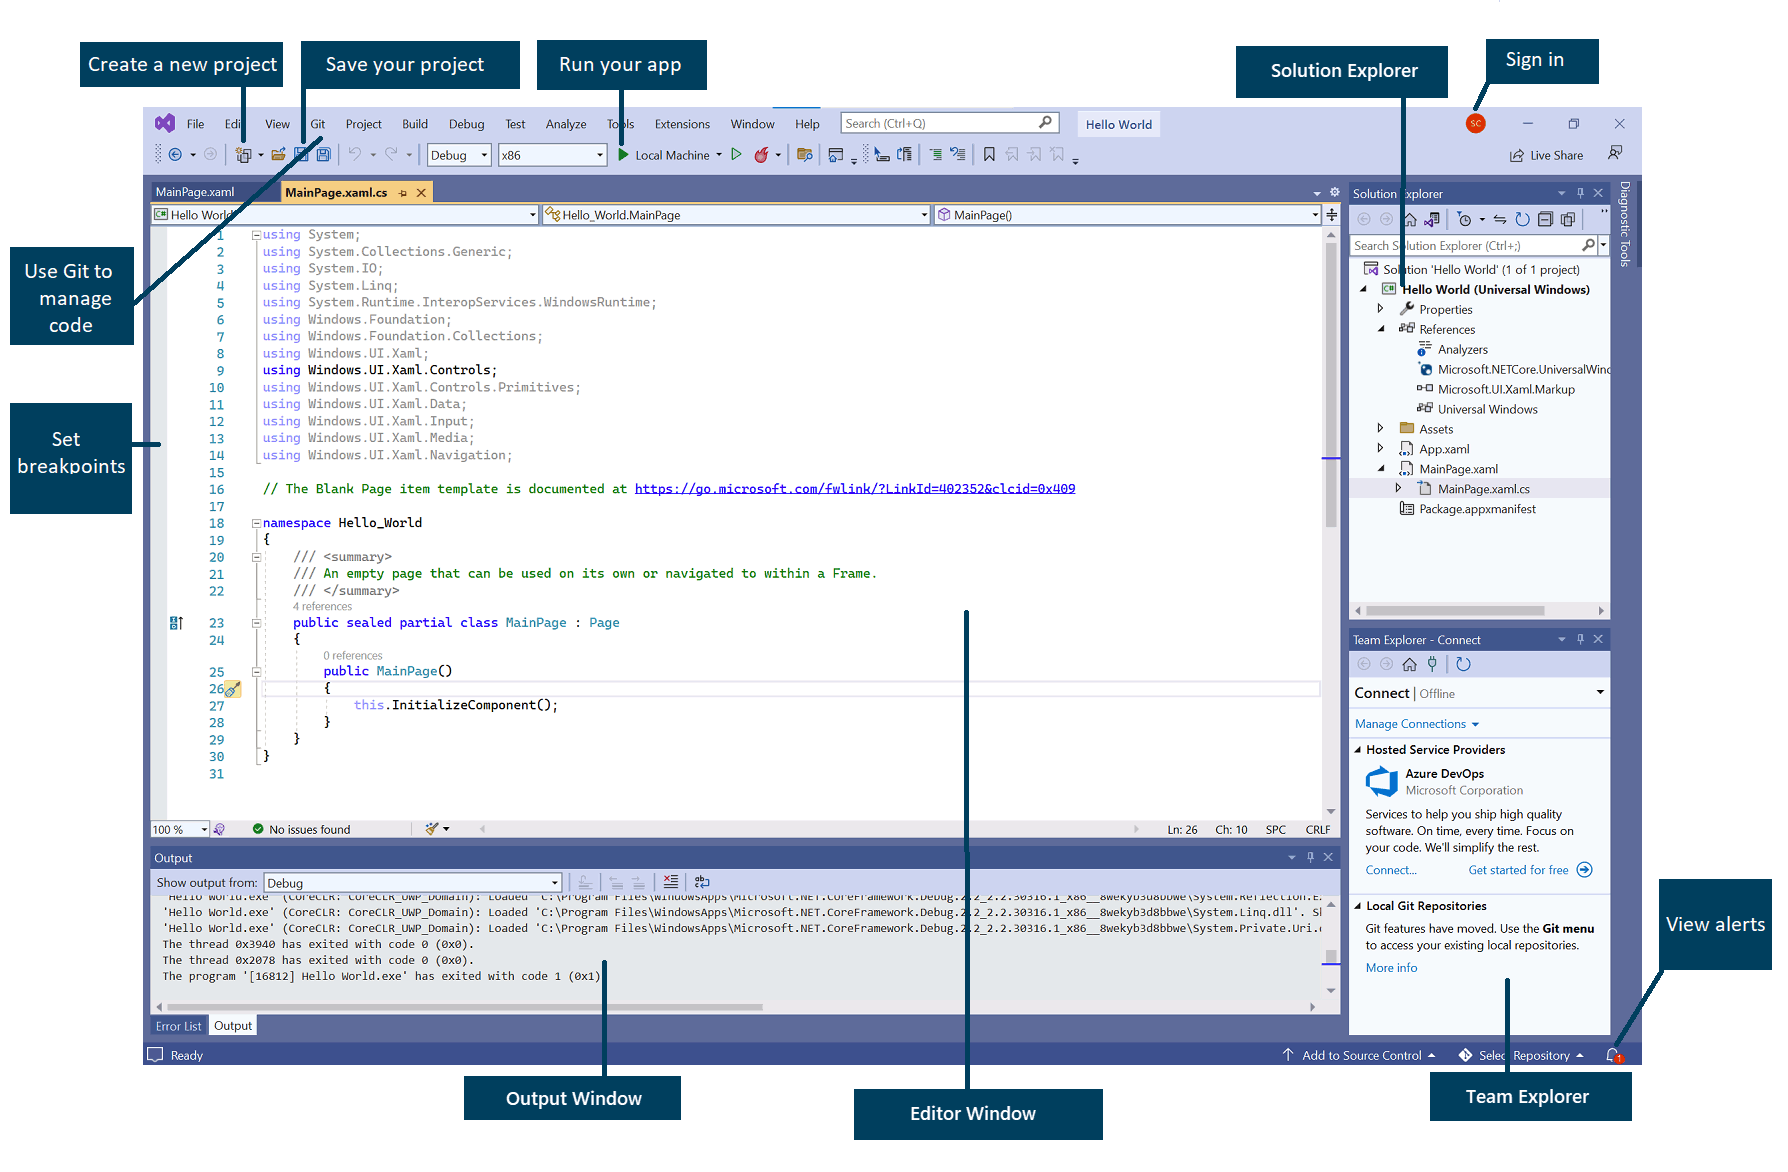
A quick tour of Visual Studio
The following image is an example of the Visual Studio UI with a Solution open.
The Solution Explorer helps you view, navigate, and manage files. Organize your code by grouping files into solutions and projects.
The Editor Window is where you edit code and design user interfaces (for example, a window with buttons and text boxes). It can also be used to display the contents of files.
The Output Window displays notifications from different message sources in separate tabs (including debugging and error messages, compiler warnings, publishing and status messages, and other notifications).
The Team Explorer allows you to track work items and share code with others using version control technologies such as Git.
The previous image shows an example with C# code. You can also use the Editor Window to design the appearance of your app. If you select a XAML file, for example MainPage.xaml, you see:
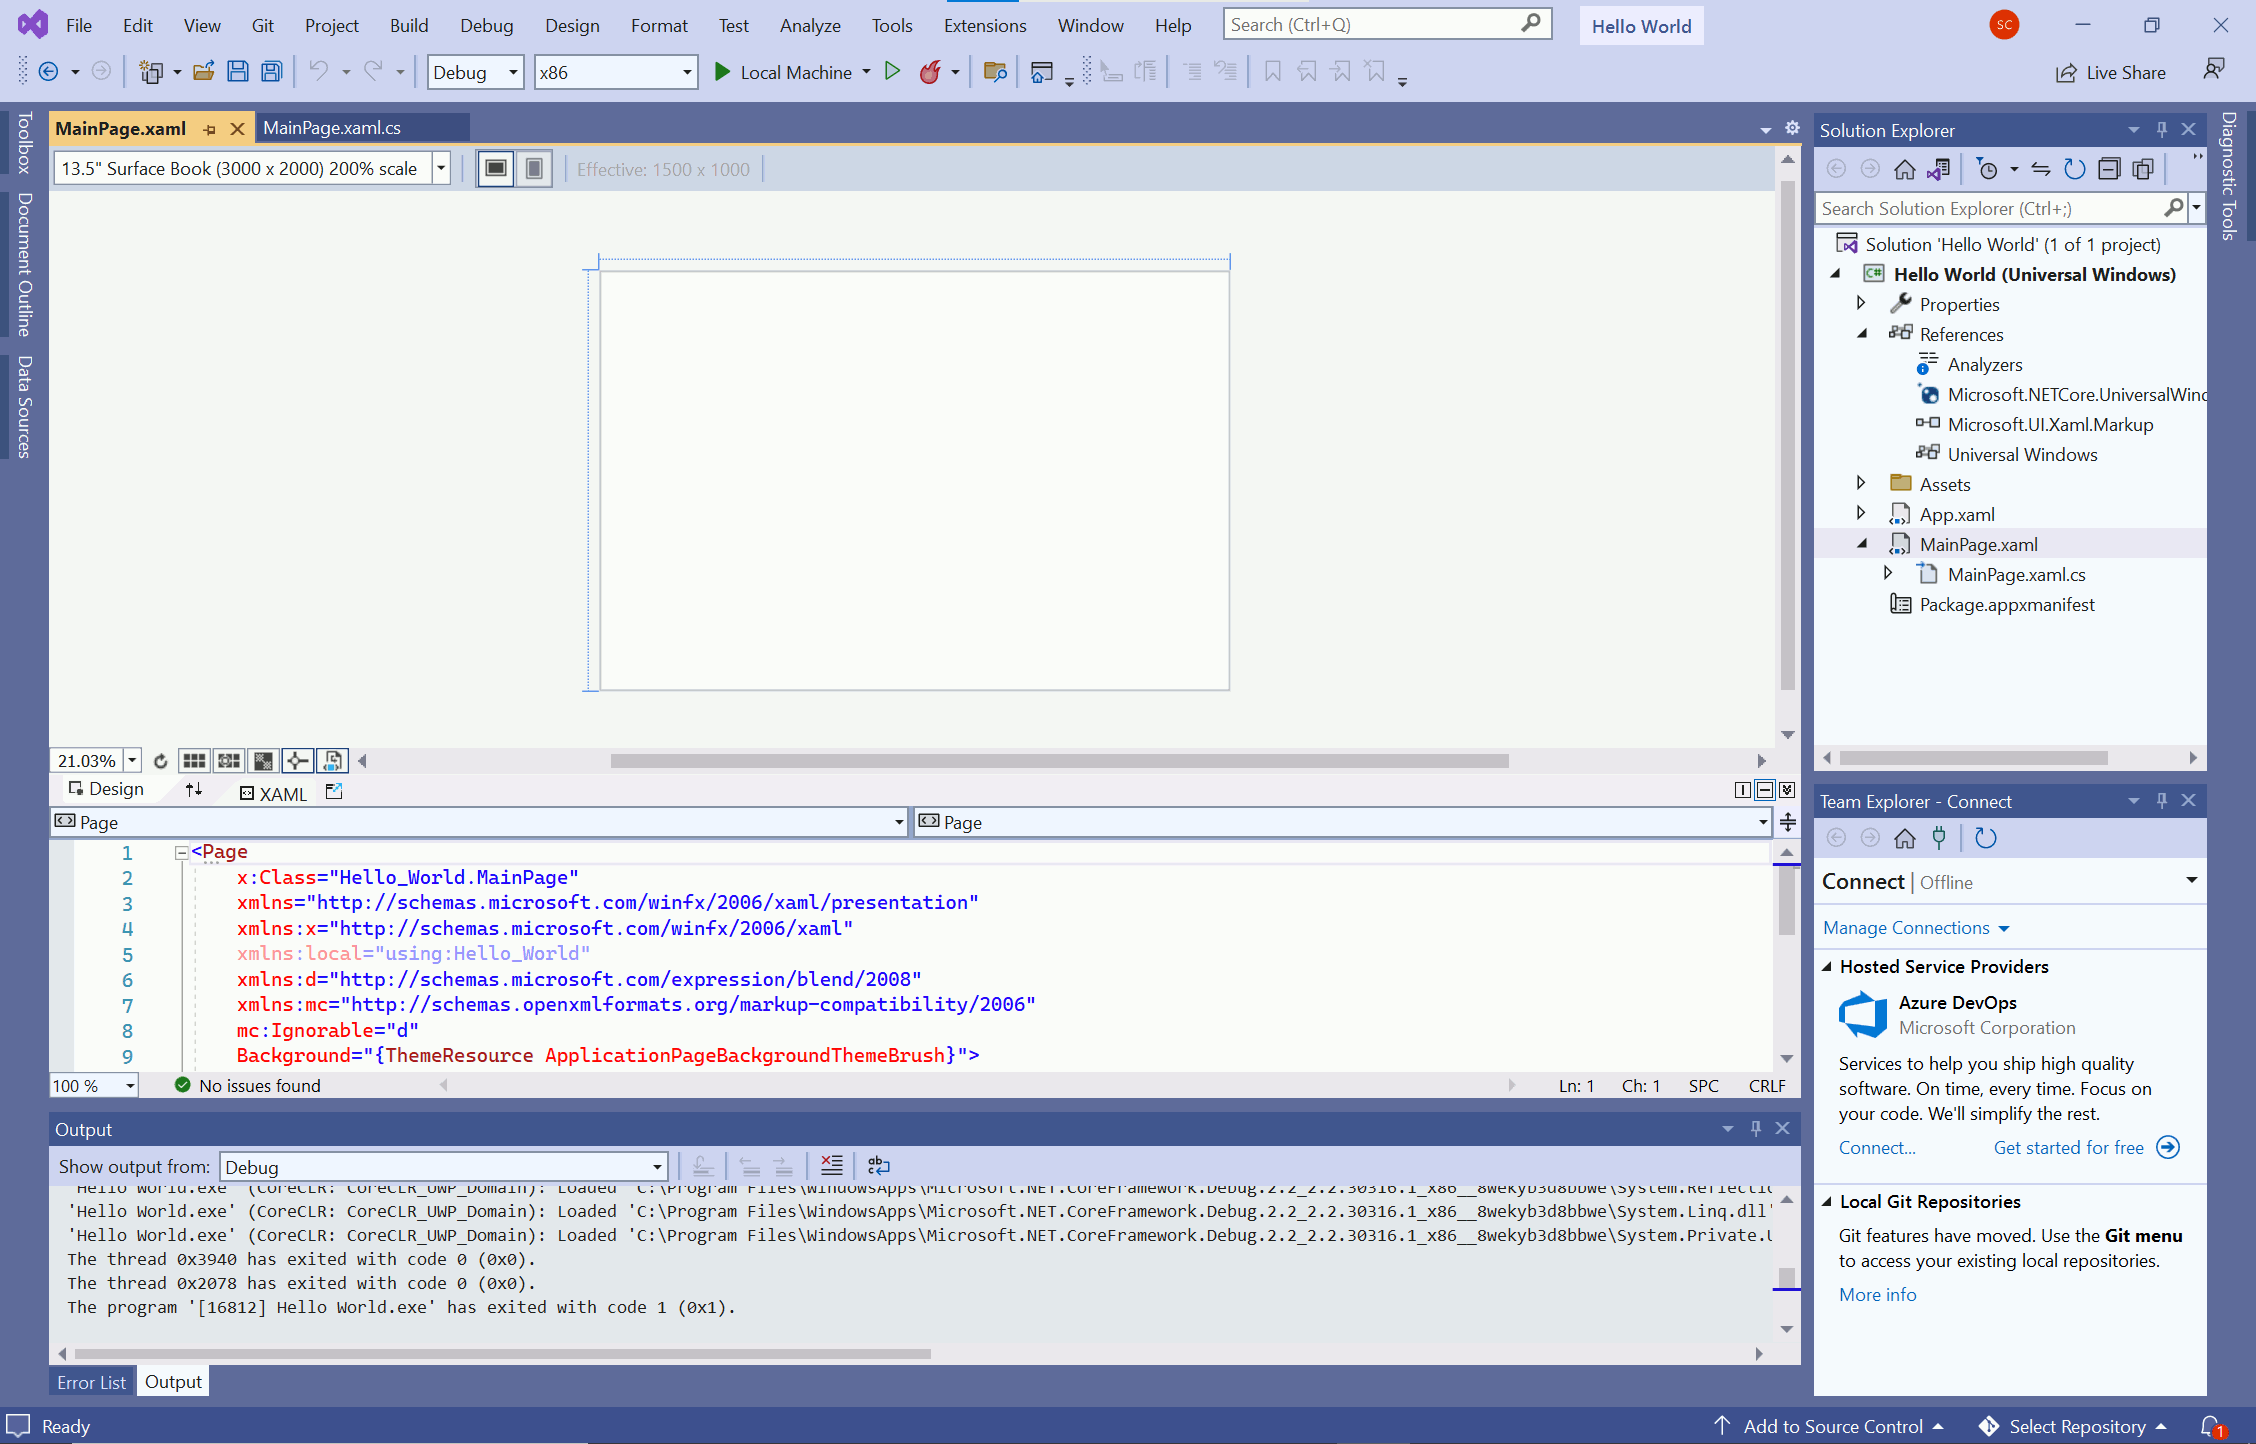
Preview your UI in the upper window along with the XAML code used to define it. You can switch between views using the arrow button. The arrow button is the border between the Design and Code views near the words Design and XAML. The preview changes whenever you change the XAML file and vice versa.
IMPORTANT
If you make changes to the XAML code that violate the formatting rules — like misspelling the name of a control or leaving out a closing (>) tag — the design view displays and Invalid Markup message. You won't be able to display a preview.
If you don't know how to fix your mistake, you can step back by selecting Edit → Undo until the preview works again.
Create a project with Visual Studio
Now that Visual Studio is up and running and you're familiar with the environment, let's create a project to test that everything works.
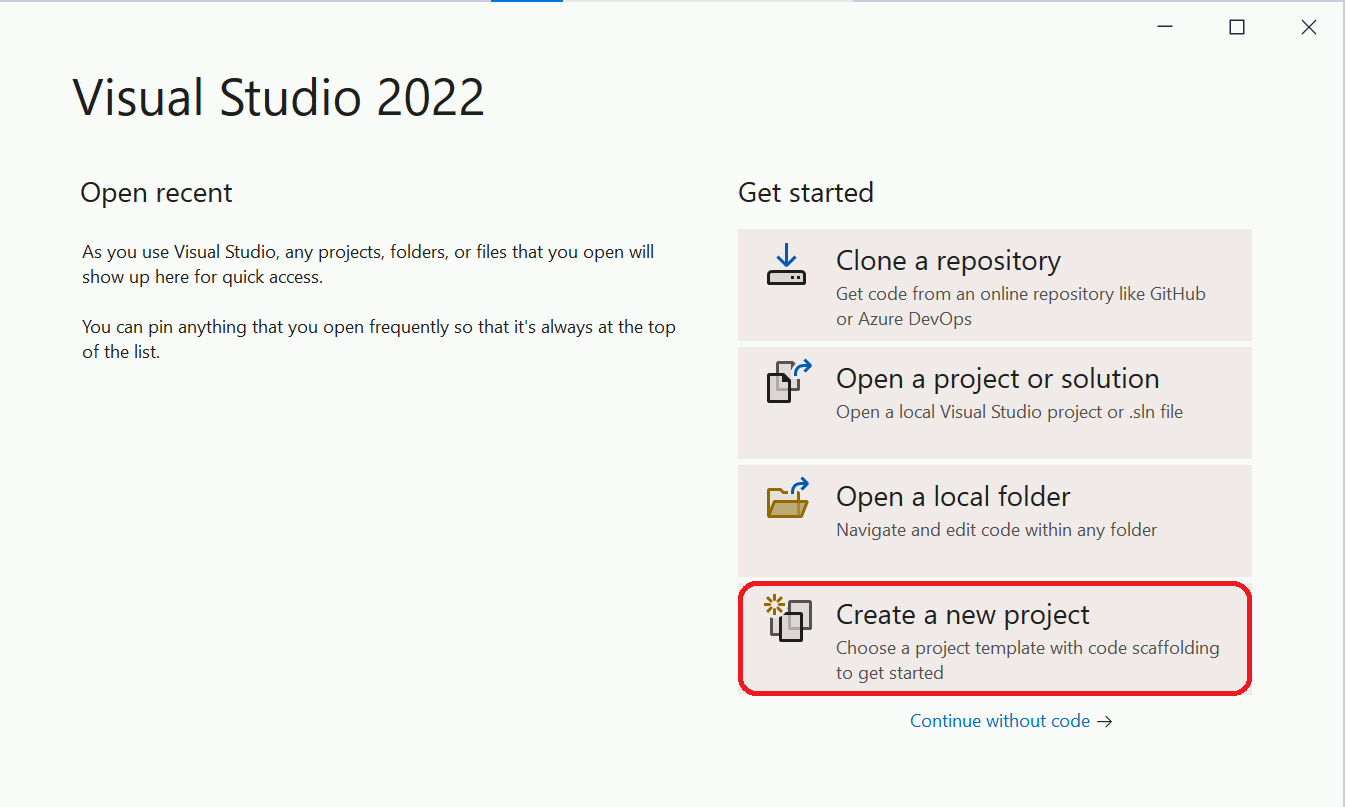
- Open Visual Studio. A Visual Studio 2022 window display. Select Create a New Project.
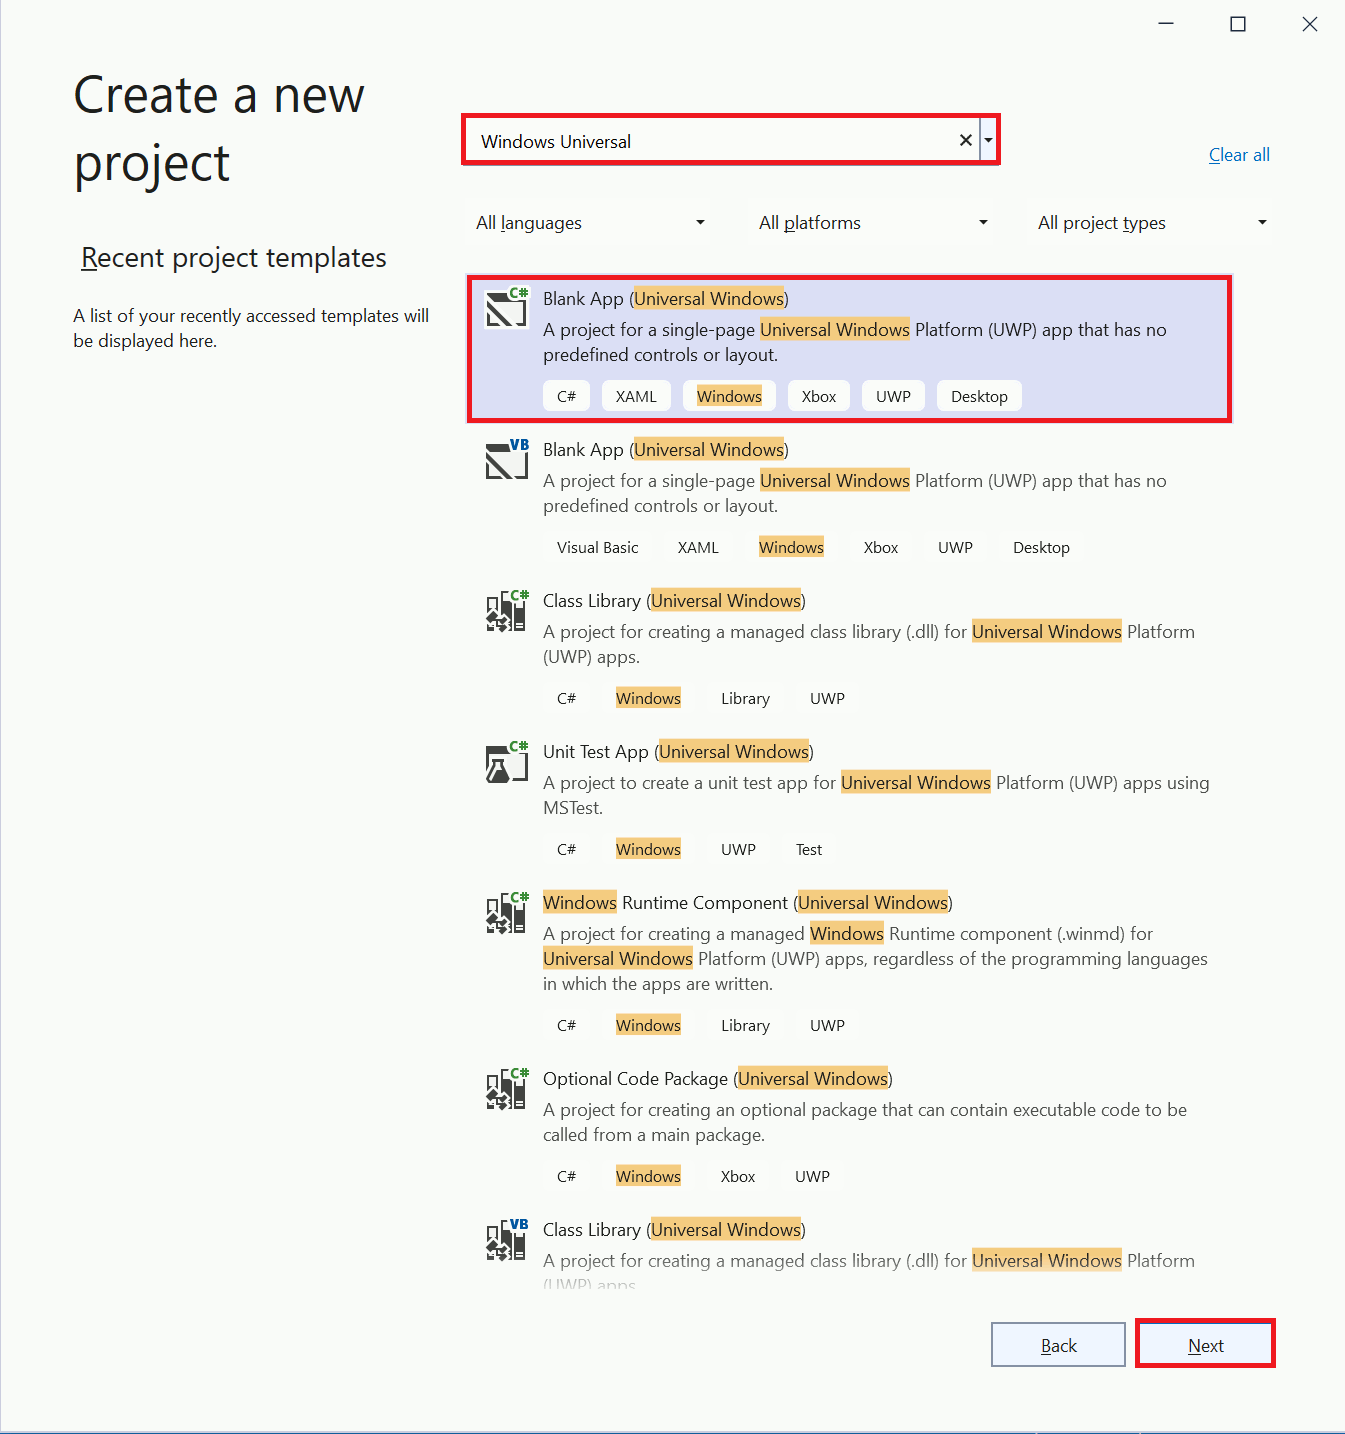
- Type Windows Universal in the search box, select Blank App (Universal Windows), and click Next.
- In the Configure your new project screen; name your app Hello World. Leave the Location and Solution name set to their default values, and click Create.
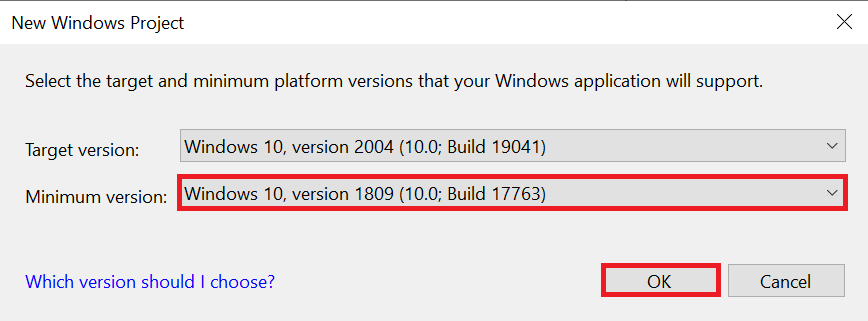
- Set the Minimum Version to Windows 10, version 1809 or higher.
- Check your debug settings on the menu bar. They should be set to Debug and x86.
- Select the green triangle Run button to build and run your app. Or, press the F5 key.
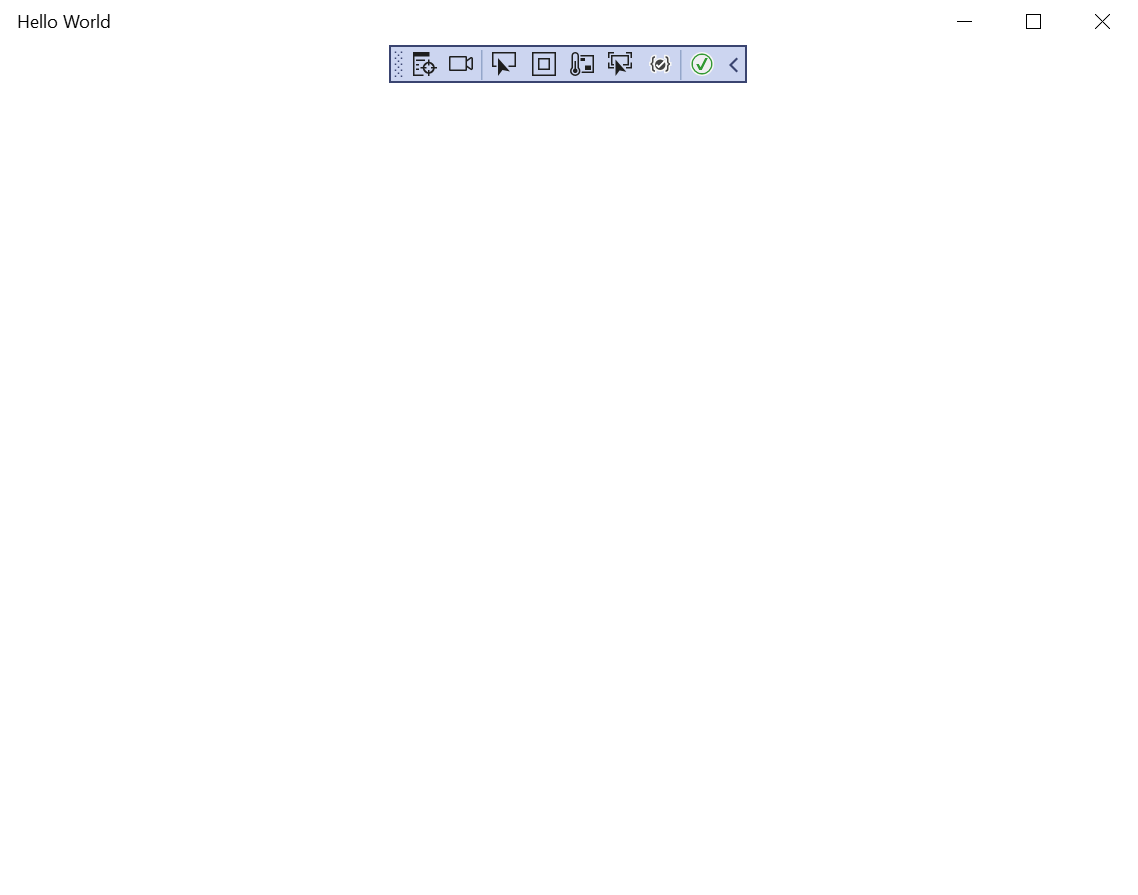
- A large, blank window displays with the text Hello World. This screen is a preview of your app when it's running.
- Close your app or select the red square Stop button on the menu bar to stop running it.
Your project is created. Your project isn't empty — some files and settings are automatically generated for you.


NOTE
The blue rectangle toward the top of your app window is a Visual Studio tool that helps with debugging. It won't appear in your final app.
